Three digit - 7 segment Display
7-Segment
7 Segment Display has seven segments in it and each segment has one LED inside it to display the numbers by lighting up the corresponding segments. Like if you want the 7-segment to display the number "5" then you need to glow segment a,f,g,c, and d by making their corresponding pins high. There are two types of 7-segment displays: Common Cathode and Common Anode, here we are using Common Cathode seven segment display.

Now we know how to display our desired numeric character on a single 7-segment display. But, it is pretty evident that we would need more than one 7-segment display to convey any information that is more than one digit. So, in this tutorial we will be using a 3-digit 7-Segment Display Module as shown below.
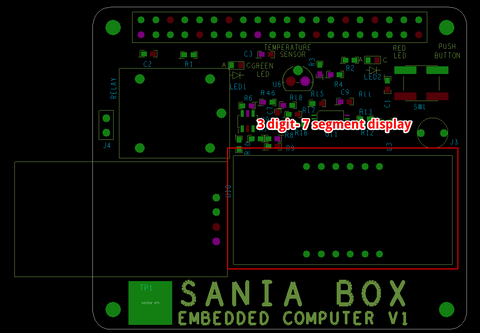
Below is the Schematics for 3 digit-7 segment display.

Following python code can be used to turn the LED on or off.
1 2 3 4 5 6 7 8 9 10 11 12 13 14 15 16 17 18 19 20 21 22 23 24 25 26 27 28 29 30 31 32 33 34 35 36 37 38 39 40 41 42 43 44 45 46 47 48 49 50 51 52 53 54 55 56 57 58 59 60 61 62 63 64 65 66 67 68 69 70 71 72 73 74 75 76 77 78 79 80 81 82 83 84 85 86 87 88 89 90 91 92 93 94 95 96 97 98 99 100 101 102 103 104 105 106 107 108 109 110 111 112 113 114 115 116 117 118 119 120 121 122 |
import RPi.GPIO as GPIO import time, datetime now = datetime.datetime.now() GPIO.setmode(GPIO.BCM) GPIO.setwarnings(False) #GPIO ports for the 7seg pins segment8 = (26,19,13,6,5,11,9,10) for segment in segment8: GPIO.setup(segment, GPIO.OUT) GPIO.output(segment, 0) #Digit 1 GPIO.setup(7, GPIO.OUT) GPIO.output(7, 0) #Off initially #Digit 2 GPIO.setup(8, GPIO.OUT) GPIO.output(8, 0) #Off initially #Digit 3 GPIO.setup(25, GPIO.OUT) GPIO.output(25, 0) #Off initially #Digit 4 GPIO.setup(24, GPIO.OUT) GPIO.output(24, 0) #Off initially null = [0,0,0,0,0,0,0] zero = [1,1,1,1,1,1,0] one = [0,1,1,0,0,0,0] two = [1,1,0,1,1,0,1] three = [1,1,1,1,0,0,1] four = [0,1,1,0,0,1,1] five = [1,0,1,1,0,1,1] six = [1,0,1,1,1,1,1] seven = [1,1,1,0,0,0,0] eight = [1,1,1,1,1,1,1] nine = [1,1,1,1,0,1,1] def print_segment(charector): if charector == 1: for i in range(7): GPIO.output(segment8[i], one[i]) if charector == 2: for i in range(7): GPIO.output(segment8[i], two[i]) if charector == 3: for i in range(7): GPIO.output(segment8[i], three[i]) if charector == 4: for i in range(7): GPIO.output(segment8[i], four[i]) if charector == 5: for i in range(7): GPIO.output(segment8[i], five[i]) if charector == 6: for i in range(7): GPIO.output(segment8[i], six[i]) if charector == 7: for i in range(7): GPIO.output(segment8[i], seven[i]) if charector == 8: for i in range(7): GPIO.output(segment8[i], eight[i]) if charector == 9: for i in range(7): GPIO.output(segment8[i], nine[i]) if charector == 0: for i in range(7): GPIO.output(segment8[i], zero[i]) return; while 1: now = datetime.datetime.now() hour = now.hour minute = now.minute h1 = hour/10 h2 = hour % 10 m1 = minute /10 m2 = minute % 10 print (h1,h2,m1,m2) delay_time = 0.001 #delay to create virtual effect GPIO.output(7, 1) #Turn on Digit One print_segment (h1) #Print h1 on segment time.sleep(delay_time) GPIO.output(7, 0) #Turn off Digit One GPIO.output(8, 1) #Turn on Digit One print_segment (h2) #Print h1 on segment GPIO.output(10, 1) #Display point On time.sleep(delay_time) GPIO.output(10, 0) #Display point Off GPIO.output(8, 0) #Turn off Digit One GPIO.output(25, 1) #Turn on Digit One print_segment (m1) #Print h1 on segment time.sleep(delay_time) GPIO.output(25, 0) #Turn off Digit One GPIO.output(24, 1) #Turn on Digit One print_segment (m2) #Print h1 on segment time.sleep(delay_time) GPIO.output(24, 0) #Turn off Digit One #time.sleep(1) |